

Have you learned the standard of sealing film?
What? Who else can’t “sealing film”? Quickly concern this article to teach you the correct “sealing film”!
Of course, the “sealing film” here is to seal the 96 well PCR plate to ensure that the sealing film closely fits the 96 hole plate and prevent liquid evaporation, so as to ensure the smooth experiment.
1. Stick the sealing film on the board
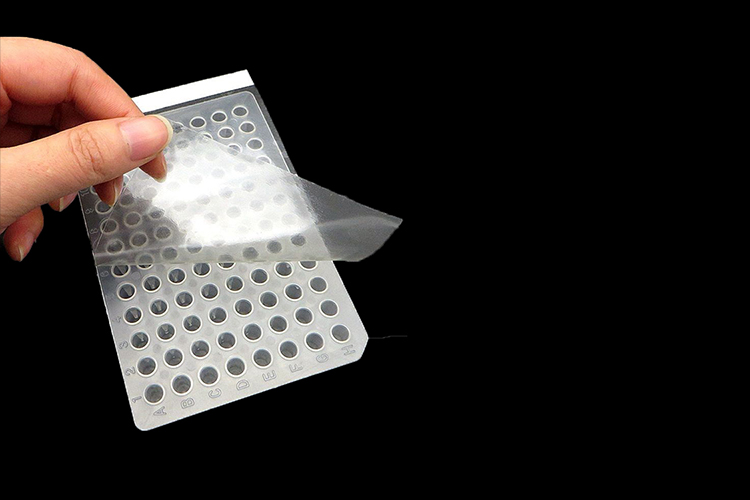
Take out a single sealing membrane from the self sealing bag, and then reseal the self sealing bag to keep the enzyme free environment. Keep the bottom lining face up, hold the sealing film, and slowly tear down the bottom lining along the tangent line.
Then, stick one end of the adhesive surface of the sealing film on the board, and grasp the distance and angle to avoid the subsequent skew. In the process of pasting, one end is pasted and the other end is pulled.
Tip: Always wear gloves
● If the sealing film of single end label is used, remove the liner partially, anchor the sealing film on the board to seal it on the whole board, and then continue to remove the liner. This method can eliminate the curl and rollback caused by the sealing film.
● If the product with two end labels is used, peel off the center liner in a continuous and smooth way. Slow stripping of the lining minimizes crimping. Be careful not to touch the bonding surface of the film.
2. Pressing film
Use the pressure plate to slowly scrape and press the sealing plate film to make it completely sealed on the plate. If there is no special laminates, you can find a card with smooth edges, such as bank card or bus card.
The film pressing step shall be performed at least twice horizontally and vertically. It is essential to apply sufficient force to obtain a good seal.
Scrape and press the membrane pressing plate along all the outer edges of the orifice plate at least twice to ensure that a firm and continuous pressure is applied. The holes and edges shall be pressed once. After sealing the sealing film correctly on the plate, pull off the joint section along the tangent line.
Tip: ● When pressing the film, hold the board with the other hand to avoid violent shaking of the board.
3. Inspection
After sealing, carefully check the flat plate to confirm whether the film is closely attached to the plate. Confirm that the adhesion marks around each hole, the whole surface of the plate (including the periphery) are sealed, and whether there is liquid on the membrane. The sealing film should not have wrinkles. If wrinkles are observed, the plate is not sealed correctly.
● For flat plates with raised edges, the positioning of the sealing film on the plate may not be correct, and the film shall not extend upward to the side wall of the plate.
Place the sealed plate for at least 10 minutes before starting the PCR experiment, and the adhesive force of the sealing film will increase with time. If possible, use the special centrifuge for orifice plate for centrifugation. Finally, transfer the sealed plate to the PCR machine to start the experiment~
Tip:
● For flat plates with raised edges, the positioning of the sealing film on the plate may not be correct, and the film shall not extend upward to the side wall of the plate.
Place the sealed plate for at least 10 minutes before starting the PCR experiment, and the adhesive force of the sealing film will increase with time. If possible, use the special centrifuge for orifice plate for centrifugation. Finally, transfer the sealed plate to the PCR machine to start the experiment~
Post time: Dec-16-2022